Mojave hackintosh build on a budget
I'm currently recording my band on a self built hackintosh (AMD Phenom X6) on Mavericks.
Now its time for an upgrade!
I've found this How To, so lets go...
Conditions:
- low budget (~400 EUR)
- try to use compatible hardware
- dual screen setup (hopefully with integrated IGPU only!)
- firewire connections for my MAudio Profire 2626
- Coffee Lake cpu which can be upgraded later
- USB 3.0 for fast transfer of my music project
Hardware:
| Hardware | Cost | Link |
|---|---|---|
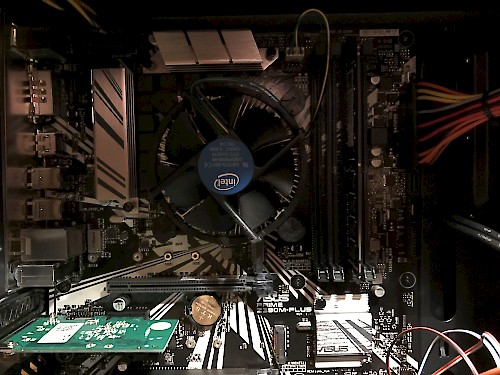
| Intel Core i3 8100 4x 3.60GHz So.1151 BOX | 116,- EUR | [Amzn.de] [Amzn.com] |
| Asus Prime Z390M-Plus Intel Z390 So.1151 | 150,- EUR | [Amzn.de] [Amzn.com B] |
| 450 Watt be quiet! System Power B9 Bulk Power supply | 42,- EUR | [Amzn.de] [Amzn.com B] |
| 8GB G.Skill Value DDR4-2400 DIMM CL17-17-17-39 Single (to be upgraded later too) |
43,- EUR | [Amzn.de] [Amzn.com] |
| 120GB Kingston A400 2.5" SSD | 21,- EUR | [Amzn.de] [Amzn.com] |
| Sharkoon VS4-S Midi Tower | 35,- EUR |
Using the Amzn links above will support this blog - thank you!
(B = provided an alternative, because currently not available at amazon.com)
Sum = 407 EUR
| PCIE Firewire Card: StarTech 3 Port 800+400 FireWire I've found on eBay | 65,- EUR | [Amzn.de] [Amzn.com] |
OK.. I decided not to care about the budget when investing in that FireWire card, because I want to do all audio with it!
I've read that the StarTech card uses the same chipset Apple is using in their Macs - so I expect no issues after installation with it.
The Build:

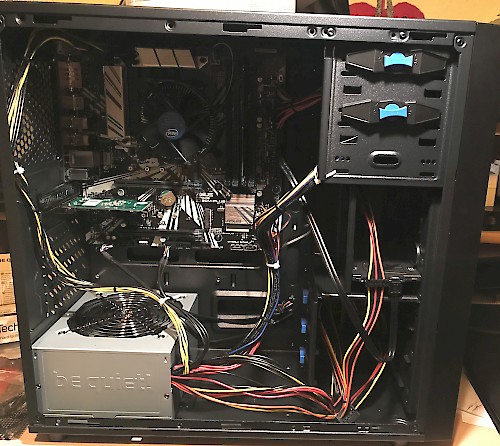
The case looks clean and nice :) But the metal is kinda thin. Does not seem to be very robust when unboxing. Its getting besser after assembly.
Better get a good case if you can - but since this is a budget build I will stick with it.
Here's a pic from inside - there's a lot room for expansion ;)
Installation:
The installation was straight forward. I won't post all steps here again in detail.
Please follow the excellent description from hackintosher.
I've an old Macbook pro 2009 laying around I've used to create the USB stick with Clover.
Steps:
- Download the Mojave Install application
- Delete / format the USB stick with HFS+ journaled
- Install Mojave to your USB stick
- Install Clover on USB
- Install Clover configurator on the Mac
- Use Clover configurator to setup your boot settings (or use the EFI zip below)
- Boot hackintosh from USB
- Install Mojave on hackintosh SSD
- Reboot several times
- Boot hackintosh SSD using Clover bootloader from USB
- Install Clover on SSD
- Boot from SSD
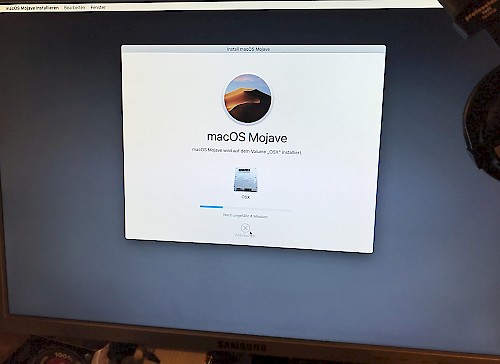
- Installation DONE :)
- FIX problems
For steps 1-6 you will need a access to a macOS. You can use aVM using VMware, I think.
Here's the zipped EFI for putting on your USB Stick.
- Download the zip File
- Open Clover configurator on your Mac.
- Mount the hidden EFI partition
- Delete the existin EFI folder
- Copy the contents of the ZIP in that EFI folder
Problems:
- Intel iGPU UHD 630 shows only 6MB memory :(
- System halts on Shutdown / Reboot
- No USB3 ports are working
youtube safed my life!
After tying to get the Intel UHR 630 graphics to work with hardware acceleration for 2 days .. I've stumbled over this video that includes a zip of their EFI partition :)
Graphics are WORKING :)
Here's the after install EFI zip with graphics working.
Remaining issues
- USB3 ports are not accepting my USB stick
Let's ROCK!
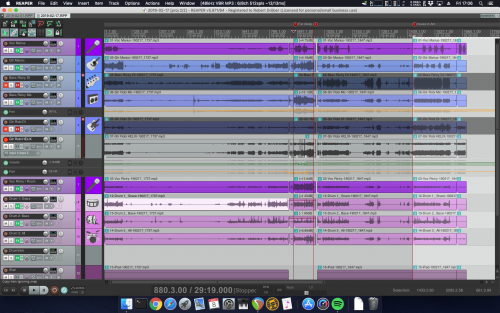
Reaper is working flawlessly with 16 tracks and plugins. :)